Today I made her very decorative penguin hat. I started with a basic fleece hat in all black. I used the
Fleece Beanie Hat tutorial from CrafyGemini on YouTube. Not only was it super easy to make, but she includes a PDF pattern to make it even easier. The only thing that I did differently was that I didn't add on the cuff like she does. I used her pattern to get the circumference correct, but my cuff was not as tall as hers. I also added a small triangle to the front so that when I sewed on the white trim, I could bring it down to form a point just like the Princess's hat.

For the "ears" on the hat I drew triangles to the shape that I wanted and cut 4 out of the black fleece (2 for each ear). I used a stiff iron-on interfacing, cut to the same size and shape as the ears and ironed that on before sewing the ears together on two sides (right sides together). Then I flipped them right side out. Using CraftyGemini's tutorial you would sew two separate halves of the hat, before putting the whole thing together, so I did that first step, then I sandwiched the ears between the two halves and sewed the hat together, that way the ears were easily part of the hat without me having to cut any holes.

The beak is two triangles of yellow gold cotton sewn together on two sides, then flipped right side out and stuffed with poly-fill. To close the back of it, I just cut a small rectangle out of some cardboard, pressed it down a little to cover the poly-fil and then hot glued the sides of the fabric to the cardboard making sure that all edges were attached and the poly-fill was totally covered. Then I just used fabric glue to attach it to the hat.
The eyes are made of a light pink craft foam and then a glittery dark pink craft foam that I found at Walmart. The glitter craft foam had a sticky back so I didn't need to use glue to attach it to the light pink. Then I used fabric glue to attach them to the hat.
For the "wings" I cut the shape out of craft foam, and covered it front and back with Plasti-Dip to seal it and make it sturdy. Because I only had white Plasti-Dip on hand, I painted the front and back with a couple of coats of yellow acrylic paint. I used Velcro dots to attach this to the hat so that I could remove the wings during travel, since they stick out from the sides.
The green "jewel" is just a fake jewel I found in a pack from Michaels glue on to a piece of yellow fleece and the smaller yellow jewel is also from a different pack from Michaels. I used Gem-Tac to attach those and since that takes 24 hours to dry well, I actually put them on last.
The white trim under the wings and around the back is the same eyelet that I used for the scarf and on the bottom of the bodice, sewn on with my machine.
For the "tassels" on both sides here's what I did. . .
1. I cut four pieces of yellow cotton to 4" wide by 22" tall. The length was what I estimated from it's placement on the hat, down to my natural waist. I cut a curve at one end of each piece, because the bottom of hers are rounded.
2. I sewed two pieces together (right sides together) on three sides, which includes the curved end.
3. For the large white beads I actually used 2" round Styrofoam balls. I had previously used 3-5 layers of Modge Podge to seal them before painting on 2-3 coats of white acrylic paint and then sealing one more time just for the shine. The tear-drop bead at the bottom and gold beads are actual beads that I found I the jewelry-making section at Michaels.
4. I used a thick twine, also from the jewelry-making section at Michaels, to string all of those together, and then used a big-eyed needle and sewed that whole thing to the center of the curved end of the yellow "tassel".
5. Lastly I stuffed the "tassel" with a few inches of polyfill just to make it a little "3D" because hers wasn't flat and then sewed them onto the hat under the eyelet trim.
That took a lot of steps and planning, but I actually like the way it turned out and it fits!
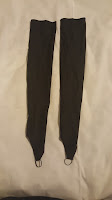
The last things I need to do are make her fluffy arm cuffs, and then go back to my Esdeath cosplay and finish the thigh highs for that. I'm so close to finished, whew.
I'm sorry I don't have more pictures of the process. I get so focused on working that I don't think about it until the piece is completed. I'm going to try to do better when I start working on my cosplays for my next convention.
Happy Cosplay!!


